Pad Play
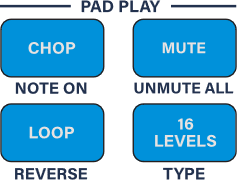
While in Sample Mode, use the PAD PLAY buttons to activate additional playback functions for the samples, described below.
Note: The MUTE function can be accessed in any mode at any time for fast performance.
|

Chop
Press the CHOP button to activate Chop Mode for the sample on the selected pad.
In Chop Mode, the sample is automatically chopped by the current chop type between the sample Start Point and End Point. You can then use the PADS to trigger each slice or select it for editing. For example, if your sample is chopped into eight slices, press PAD 5 to select Slice 5.
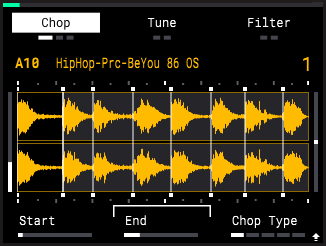
When Chop Mode is activated, the Trim controls on the Sample Page are replaced by the following Chop controls:
-
K1 – Start: Adjust the slice start point (0 – 100%, depending on the length of the slice).
SHIFT+K1 – Zoom: Start: Zoom in or out of the sample waveform at the slice start point (0 – 100%).
-
K2 – End: Adjust the slice end point (0 – 100%, depending on the length of the slice).
SHIFT+K2 – Zoom: End: Zoom in or out of the sample waveform at the slice end point (0 – 100%).
-
K3 – Chop Type: Adjust the chop type. This determines how a sample is chopped when in Chop Mode.
Threshold: In this mode, slices are placed automatically according to the Threshold setting.
Regions 4/8/16: In these modes, slices are divided evenly across the length of the sample to create the selected number of slices (4, 8, or 16).
Manual: In this mode, you can manually create slices. Tap PAD 1 to begin playing the sample and add the initial slice start point. As the sample plays, tap pads to add additional slices. You can add up to 16 slices per sample.
SHIFT+K3 – Threshold: When Chop Mode is set to Threshold, press and hold SHIFT and turn this knob to adjust the Threshold value (0 – 100%). Generally, the higher the threshold, the fewer the resulting slices.
Press and hold SHIFT and press the B1 Function Button to Extract the currently selected slice. The selected area is exported as a new sample and automatically added to the next available pad. This is a non-destructive edit, so the original sample remains fully intact.
Press and hold SHIFT and press the B2 Function Button to Split the currently selected slice. This automatically cuts the selected area in half, creating two slices in place of one. The subsequent slice numbers also increase by one.
Press and hold SHIFT and press the B3 Function Button to Merge the currently selected slice with the previous slice. All subsequent slice numbers will decrease by one.
For example, if you have a sample with eight slices and Merge Slice 2, Slice 2 is added to Slice 1, leaving seven slices in total. The previous Slice 3 becomes Slice 2, and so on.
Press and hold the ERASE button and tap a PAD to remove a slice. This will also merge the removed slice with the previous slice and decrease all subsequent slice numbers by one.
Note: Editing slices automatically sets the Chop Type to Manual.
Editing slices also cannot be undone or redone using the UNDO/REDO functions.
|
To exit Chop Mode, press the CHOP button again.
 +
+ Note On
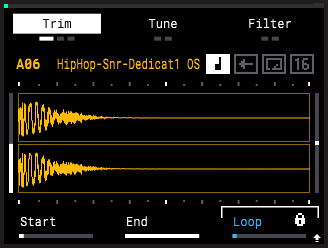
Press and hold SHIFT and press the CHOP button to enable Note On playback for the sample on the selected pad. When set to Note On, the sample will play only as long as the pad is held down. Once the pad is released, sample playback will stop. When Note On is off, the sample plays as a “One Shot” instead, playing in its entirety each time the pad is triggered (except when the LOOP function is engaged, in which case triggering the PAD starts and stops the loop).
Enabling Note On mode for a sample also affects the Amplitude Envelope and Filter Envelope controls for the selected pad. Instead of Decay parameters, these Envelopes will have Release parameters. See the previous Sample Mode section for more information on the Envelope parameters.
Note On playback is indicated for each sample in Sample Mode with the note icon (  ).
).
).

Loop
Press the LOOP button to activate looping playback for the sample.
To start loop playback, tap a PAD while Loop is activated to begin playing the sample from the Sample Start point. When the sample reaches the Sample End point, it returns to the Loop Start point and keeps playing.
By default, the LOOP LOCK function is engaged when looping playback is activated. This locks the Sample Start point to the Loop Start point. While in Sample Mode, press and hold SHIFT and press the B1 Function Button to disengage Loop Lock. When disengaged, the Sample Start point and Loop Start point can be set independently.
If the sample is also in Reverse playback, it begins at the Sample End point and plays backwards until reaching the Sample Start point, then returns to the Sample End point and keeps playing.
Loop playback also affects how the Amp Env is applied. If the sample is set to One Shot playback and the envelope is set to Decay From End (default), the loop plays indefinitely until the pad is toggled off. If the sample is set to One Shot playback and the envelope is set to Decay From Start, the loop plays until it is manually toggled off, or until the Decay stage of the envelope is completed and mutes the sample.
To stop loop playback, tap the pad again. If the sample is also in Note On playback, it keeps looping as long as the pad is being held, and stops once the pad is released.
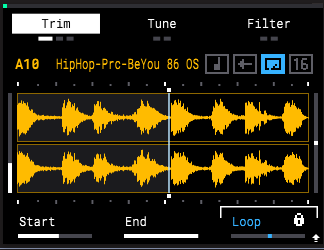
Loop playback is indicated in Sample Mode by the loop icon (  ).
).
). +
+ Reverse
Press and hold SHIFT and press the LOOP button to activate reverse playback for the sample. When activated, the sample plays in reverse, starting from the Sample End Point and moving backwards to the Sample Start Point (or Loop Start Point, if Loop playback is active).
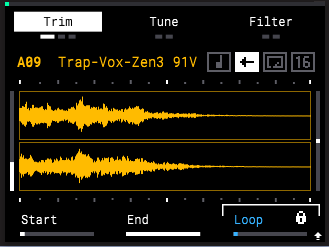
Reverse playback is indicated in Sample Mode by the arrow icon (  ).
).
).

Mute
Press the MUTE button to activate the mute function of the pads. You can also press and hold this button to temporarily engage the mute function. Release the button to disengage.
When mute is activated, the pads no longer trigger samples, and can instead be used to mute and unmute individual samples. This can be useful when playing sequences to create dynamic arrangements by bringing elements in and out of the sequence.
To mute a sample, press the respective pad so that it is lit red. Unmuted samples are lit yellow.
To unmute a sample, press a pad that is lit red so that it returns to yellow. You can also use the UNMUTE ALL function, described below, to unmute all samples at the same time.
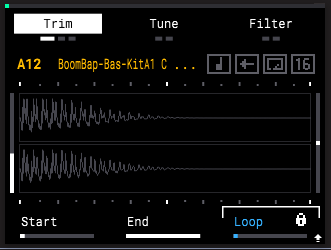
If a muted sample is selected in Sample Mode, the waveform will appear greyed out, and the sample will not trigger.
This function can be accessed from any mode at any time for fast performance.
+ Unmute All: Press and hold SHIFT and press the MUTE button to unmute all muted samples at the same time.
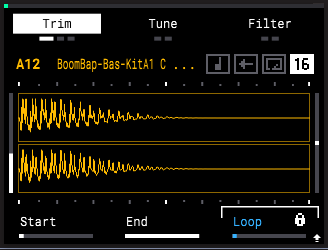
16 Levels: Press the 16 LEVELS button to activate 16 Levels mode for the sample on the currently selected pad. When activated, the current sample is copied across all 16 pads, with a selected parameter increasing in value across the pads. This allows you to create more dynamic arrangements by adding variations of the sample without having to load multiple versions of the same sound. 16 Levels mode is indicated on the Sample page by the 16 icon (  ).
).
). +
+ TYPE: Press and hold SHIFT and press the 16 LEVELS button to cycle between the available 16 Levels types. This determines how the sample changes across the 16 pads.
-
Velocity: The sample increases in velocity across the 16 pads.
-
Filter: The filter cutoff point of the currently selected filter type is adjusted across the 16 pads. Pads 1–8 increase the cutoff from the minimum point to the current Cutoff value. Pads 9–16 increase the cutoff from the current value to the maximum point. Depending on the current Cutoff value, the range of available value adjustment may be limited. The Cutoff value can be adjusted using the Filter functions in Sample Mode.
-
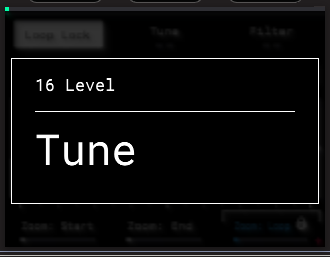
Tune: The pitch of the sample is adjusted across the 16 pads. The sample at its original pitch is placed on PAD 4, with pads below this lowering in pitch and pads above this increasing in pitch.