
Tutorial
This tutorial walks you through the basics of making beats with MPC Sample. We recommend following the steps in this chapter in order.
There are links throughout this section to later chapters of the manual if you would like to learn more about specific functions.
You can also watch tutorials by visiting the Akai Professional YouTube channel at youtube.com/AkaiProVideo.
Playing Sounds
As soon as you turn on MPC Sample, a sample demo project loads automatically so you can get started immediately.
-
Press the POWER button to turn MPC Sample on.
-
Turn up the MAIN VOLUME knob.
 This will adjust the audio level coming from the built-in speaker, or from the PHONES or AUDIO OUT if you have audio output devices connected to them.
 -
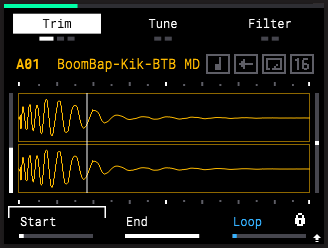
Press the PLAY button to hear a sequence using the startup project. As the sequence plays, the pads light up as each sound is triggered.

-
Press the STOP button to stop playback. If you want to stop all sounds at once, quickly double-press the STOP button.

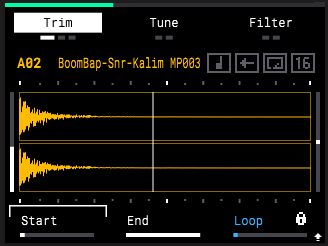
After you stop the sequence, try tapping on the pads. Each time you hit a pad, the sample triggers, and the sample waveform is shown on the MPC Sample display. This is known as Sample Mode, which can be accessed any time by pressing the SAMPLE button.

Exploring Samples
MPC Sample includes hundreds of different samples, from individual drum and instrument hits to full drum breaks and melodic phrases.
-
Tap a pad, and then press the SAMPLE SELECT button. For example, try tapping PAD 2 and then press SAMPLE SELECT.
 +
+ 
-
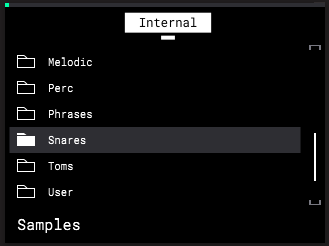
Turn the ENCODER to browse the list of sample content folders. Try turning the ENCODER so that the Snares folder is highlighted.

-
Press the ENCODER to open the folder, and then turn it to browse the list of samples. As each sample is highlighted, the sample is previewed from the built-in speaker or a connected audio output.
-
Select a new sample, and then press the ENCODER to load the highlighted sample to the pad.
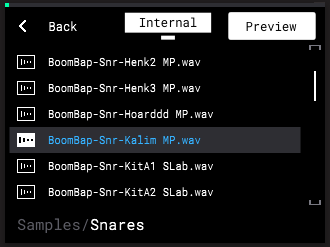
-
Press the SAMPLE SELECT button again to return to Sample Mode.
-
Try playing the sequence back again to hear the difference in sound with the new sample.
Playing Sequences
Now that you’ve heard one sequence, you can explore how to use MPC Sample to play multiple sequences together.
-
 In this mode, the pads are used to select and trigger different sequences.
 -
With PAD 1 still selected, press the PLAY button again to begin sequence playback.
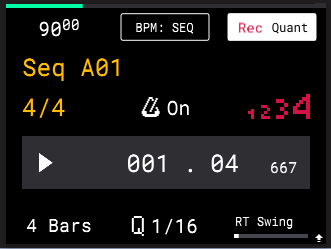
-
While Sequence 1 is still playing, tap PAD 2. This queues Sequence 2 to start playing as soon as Sequence 1 ends, and PAD 2 will start blinking. Continue listening until you hear the sequence change. PAD 2 also lights up once that sequence begins playing.
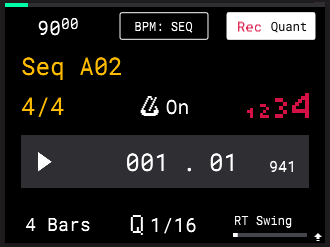
-
Try triggering other sequences in different orders as MPC Sample continues playing to hear how you can create longer songs with different parts.
-
When you are finished, press the STOP button to stop playback.
Recording a Sequence
While in Sequence Mode, you can also try recording your own new sequence using the current sounds.
-
Tap a dimly lit pad to select an empty sequence. For example, tap PAD 9 in the demo startup project.

-
Press and hold the B1 Function Button (the left-most button above the display) to open the Sequence BPM window.
 Turn the ENCODER to adjust the tempo to the desired BPM.
 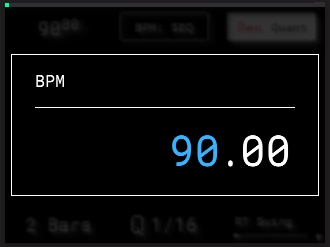 You can also press the TAP TEMPO button at a regular interval to set a new tempo.
-
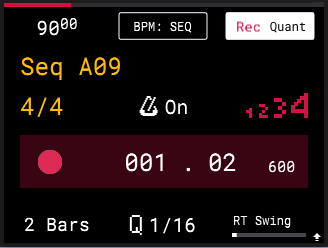
Press the B3 Function Button (the right-most button above the display) to turn Record Quantization on or off. When on, the notes you play while recording are snapped to the grid at the current Q value.
 You can adjust the Q value by turning the K2 Knob.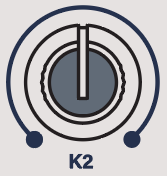
-
Turn the K1 Knob to adjust the sequence length, in bars.

-
When you are ready to record, press the SEQ RECORD button, and the pads will return to sample triggering mode.

-
Press the PLAY button to begin recording, and tap the pads to add recorded events.
-
When the end of the Sequence is reached, MPC Sample continues overdub recording and any samples triggered will play back at their recorded locations.
-
When you are finished, press the SEQ RECORD button again to stop recording but continue playback. You can also press the STOP button to stop recording and playback at the same time. The pads will return to sequence triggering mode. /
-
Try launching your new sequence, and then try launching other sequences in the project.
Starting a New Project
When you’re ready to move on from the included startup project, you can start a new project.
-
 +
+ 
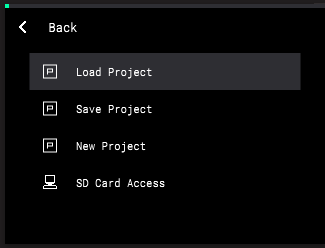 Tip: If you’d like to save your work so far, turn the ENCODER so that Save Project is highlighted, and then press it to select. You can use the ENCODER and -/+ buttons to enter a name for your project and save it.
 -
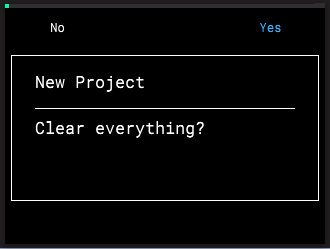
Turn the ENCODER so that New Project is highlighted, and then press it to select.
-
If you have unsaved changes in the current project, you can press the B3 Function Button to confirm you want to clear everything. If you need to save your project, press the B1 Function Button to return to the Project menu, and follow the instructions in the Tip above to save your project.
Recording a Sample
In addition to the hundreds of included samples, you can sample any kind of audio with MPC Sample to create your own samples. Let’s try using the built-in microphone to capture sound from around you to create a new sample.
-

-
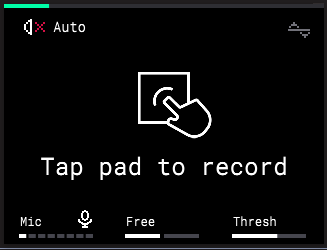
Turn the K1 Knob to adjust the current input Source. Select Mic for the built-in microphone.
-
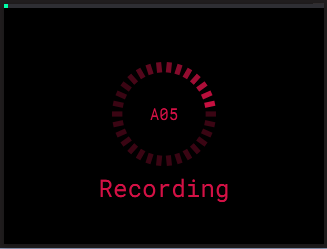
Tap a pad to begin recording. Try humming, singing, or even tapping on your surroundings to make some noise!
-
When you are finished recording, tap the PAD again to return to the Sample Record page.
Editing a Sample
After recording your own sample, or if you want to change one of the included samples, you can use MPC Sample’s editing features.
-
Make sure you are in Sample Mode by pressing the SAMPLE button.
-
Tap a pad to select the sample you want to edit. If you recorded a sample above, tap that pad to select it.
-
Your recorded sample might have extra audio around the start and end of your recording that you don’t need.Turn the K1 Knob to adjust the sample Start point. Turn the K2 Knob to adjust the sample End point. Try isolating the best part of your recorded sample.
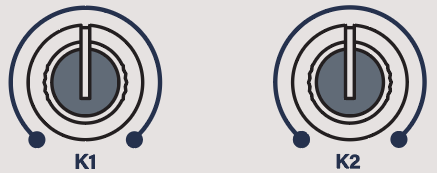
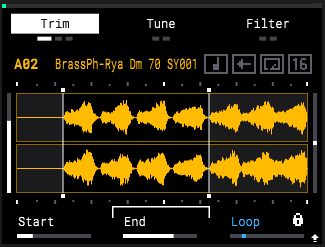 Tip: If you move the knob but the parameter doesn’t change, look for the arrows next to the parameter name. Move the knob in this direction until you regain control of the parameter.
-
When you tap the pad again, the sample now plays between the sample Start and End points. You can permanently alter the sample to be this length by pressing and holding SHIFT and pressing PAD 13 – TRIM SAMPLE. This will discard any audio before the Start point and after the End point. +

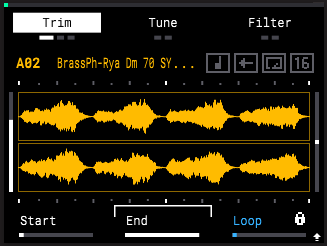
There are many other ways to edit your sample.
-
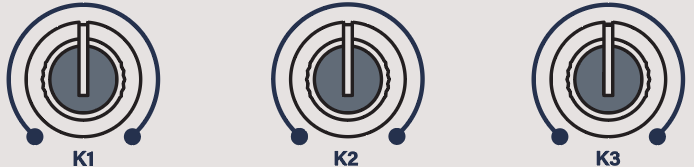
Try pressing the B1, B2, and B3 Function Buttons to cycle between different options in Sample Mode. Use the K1, K2, and K3 Knobs to adjust the various parameters, from pad volume and tuning to filter and amplitude envelopes.

-
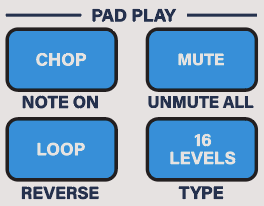
Try using the buttons in the PAD PLAY section to adjust sample playback. For example, press the LOOP button to make the sample loop continuously when triggered.
-
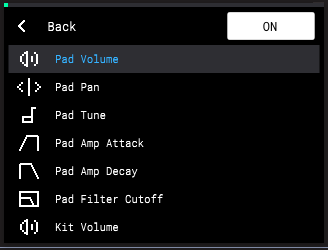
Press and hold SHIFT and press PAD 9 – FADER to open the Fader control menu. You can select from different parameters that can be adjusted using the Fader. Try selecting Pad Tune. Move the fader as you trigger a pad to hear the pitch of the sample change. +
Using FX
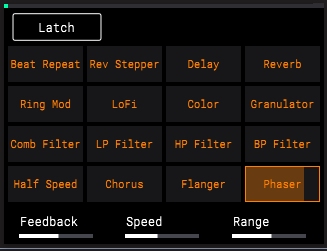
As your projects grow, you can take your beats to the next level with MPC Sample’s powerful effects. First, try using the Pad FX mode. In this mode, each pad triggers a different effect, and the level of the effect is determined by how hard you press the pad.
-
Press the PAD FX button to open Pad FX mode.

-
Press the PLAY button to play the current sequence, and then tap and hold on the pads to trigger the respective effects.
-
Use the K1–K3 Knobs to adjust different parameters for each effect.
Next, try using Knob FX mode. In this mode, a single effect is controlled using the K1–K3 Knobs, freeing the MPC Sample pads for other uses. For example, this is perfect for applying effects as transitions between sequences.
-
Press the KNOB FX button to open Knob FX mode.

-
Press SEQ to open Sequence mode, and press PLAY to play a sequence.
-
Use the K1–K3 Knobs to adjust the effect while you launch different sequences.
-
To change the current Knob FX, press and hold SHIFT and press the KNOB FX / FX SELECT (
 ) button. Use the ENCODER to select a different effect. +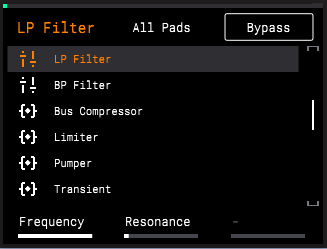
While in this menu, you can also press the PADS to determine which samples are affected by the Knob FX. Lit pads are affected by Knob FX, while dim pads are not affected. Press the B2 Function Button to apply Knob FX to All Pads at once.
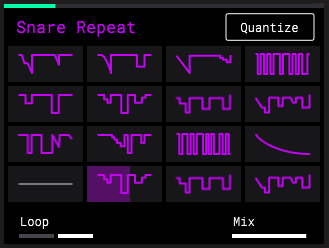
Finally, let’s explore Flex Beat mode. Similar to Pad FX, the pads trigger different effects in this mode, but the effects are time-based effects that warp the pitch, time, and volume of your sequence for beat chops, DJ-style scratches, and trance gate effects.
-
Press and hold SHIFT and press the PAD FX / FLEX BEAT button to open Flex Beat mode. +
-
Press the PLAY button to play the current sequence, and then tap the pads to trigger the respective effects. Each Flex Beat effect begins looping once you press the pad, and you will hear your sequence’s audio change.
-
Press PAD 1 to return to the “Empty” effect.

In addition to the many features and functions covered in this Tutorial, there’s so much more you can do to make beats with MPC Sample.
The following Features chapter gives you a breakdown of every connection and control on MPC Sample and its function.