User Guide
×

Features

 
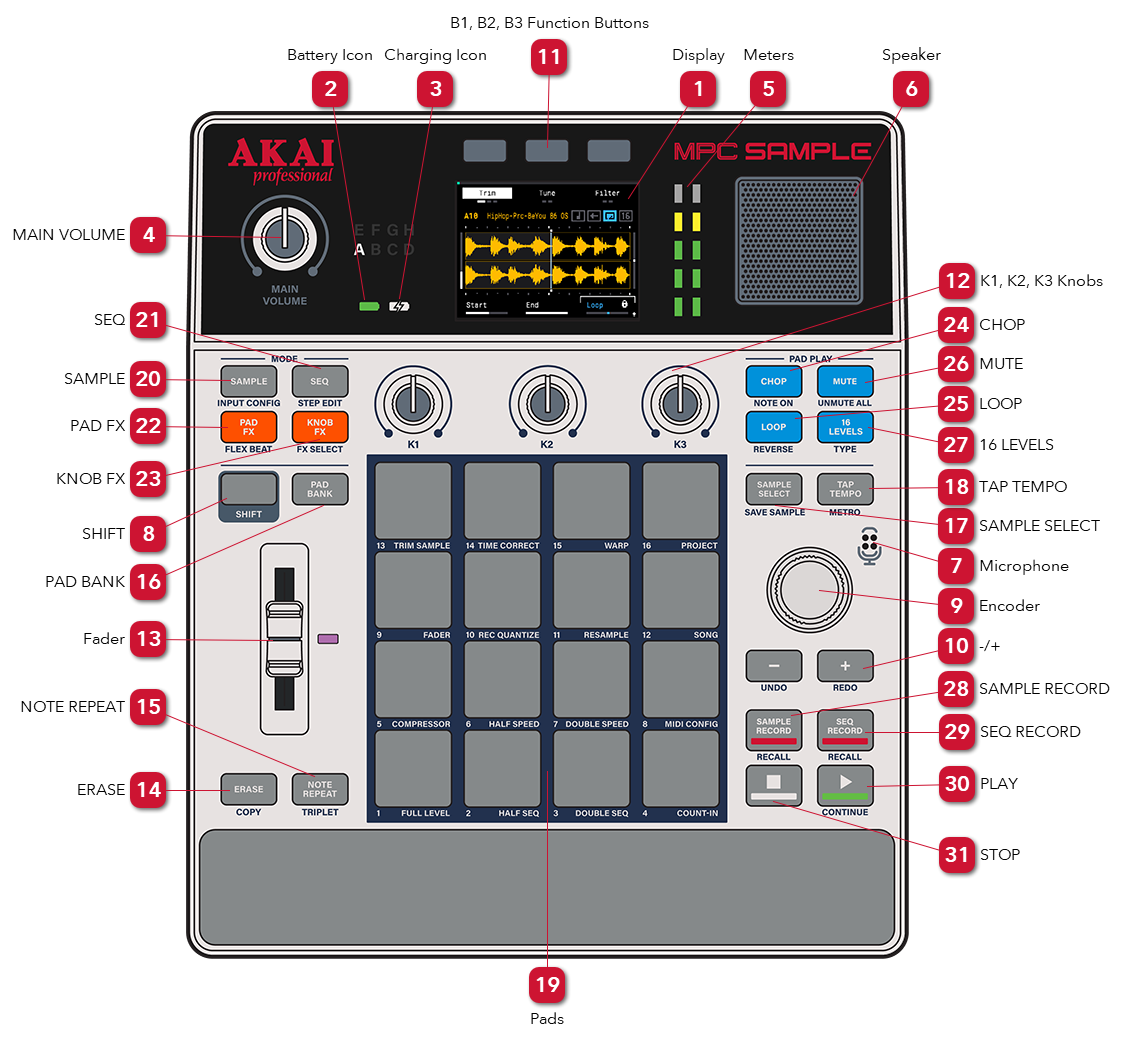
This chapter describes the functions of MPC Sample’s connections and controls. Click on the picture to jump directly to the selected control.
 
For more information on using some of the features described below, proceed to the following Operation chapter.
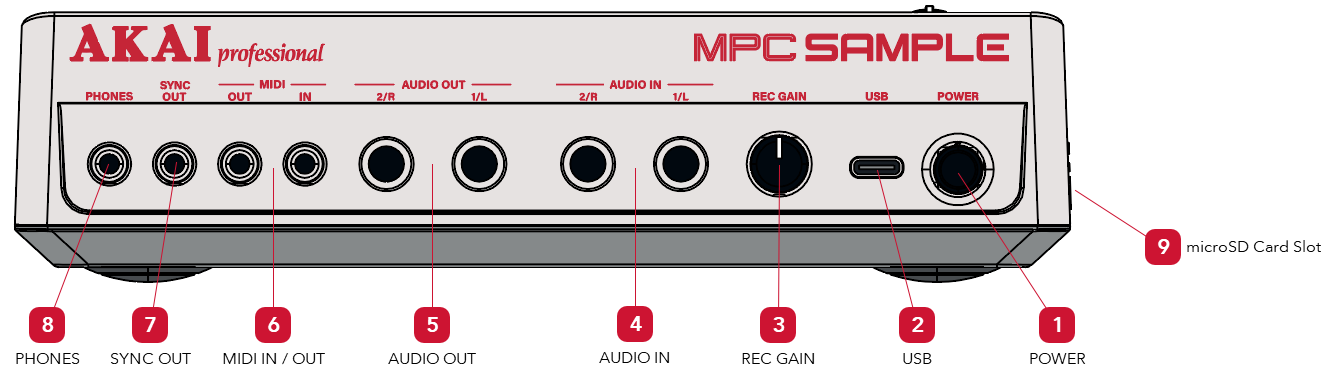
 
 
Features
1

POWER

1. POWER
Press this button to turn MPC Sample’s power on and off.
2

USB

2. USB
To power MPC Sample and charge the internal battery, use the included USB-C cable to connect this port to a USB-C power adapter or USB-C power bank (not included). When charging, the Charging Icon on the top panel lights up.
You can also connect this to a USB-C host port on your computer (or mobile device) to send and receive audio and MIDI, and transfer files to and from a microSD card inserted into the microSD Card Slot.
Important: Depending on the type of USB cable and power source used, charging of MPC Sample may be limited to when it is powered off only. For best results, use the included USB-C cable with a minimum 5V, 2A power source.
3

REC GAIN

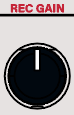
3. REC GAIN
Turn this knob to adjust the recording level of the line-level AUDIO IN connections.
4

AUDIO IN

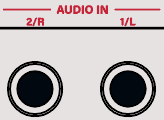
4. AUDIO IN
Use these 1/4” (6.35 mm) TRS inputs to connect a microphone, instrument, or other line-level audio source (mixer, synthesizer, drum machine, etc.).
5

AUDIO OUT

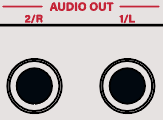
5. AUDIO OUT
Use these 1/4” (6.35 mm) TRS outputs to connect to your speakers, a mixer, or other audio output destination. Use the MAIN VOLUME control to adjust the level of the audio output.
6

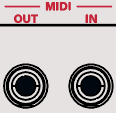
MIDI IN / OUT

6. MIDI IN / OUT
Connect external MIDI devices such as drum machines or synthesizers to the MIDI Input and Output using 1/8” TRS (Type A) to 5-Pin MIDI DIN connectors (not included).
7

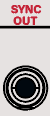
SYNC OUT

7. SYNC OUT
Use this 5V control voltage (CV) output (1/8" [3.5 mm], TS) to send clock pulse for syncing external modular gear.
Note: You can adjust MIDI and Sync settings in the MIDI Configuration menu.
 
8

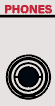
PHONES

8. PHONES
Connect standard headphones here to monitor MPC Sample’s audio. Use the MAIN VOLUME control to adjust the level of the headphones output. When headphones are connected, the built-in Speaker will be deactivated.
9

microSD Card Slot

9. microSD Card Slot
Insert a microSD card here (left side of device) for external file storage. You can access this storage using SD Card Access Mode in the Project menu.


Features
1

Display

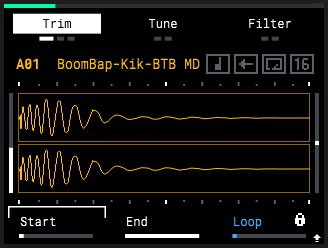
The display on MPC Sample shows the various menus and parameters available. To learn more about all of MPC Sample’s features and functions, continue reading below and proceed to the Operation chapter for more details.
2

Battery Icon

2. Battery Icon
This icon shows the current battery life of MPC Sample. If this icon is green, the battery has between 100% and 30% charge. If the icon is amber, the battery has between 29% and 15% charge. If the icon is red, the battery has between 14% and 5% charge. If the battery is blinking red, the battery has less than 5% charge and needs to be connected to power immediately.
3

Charging Icon

3. Charging Icon
This icon shows the current battery life of MPC Sample. If this icon is green, the battery has between 100% and 30% charge. If the icon is amber, the battery has between 29% and 15% charge. If the icon is red, the battery has between 14% and 5% charge. If the battery is blinking red, the battery has less than 5% charge and needs to be connected to power immediately.
4

MAIN VOLUME

4. MAIN VOLUME
Turn this knob to adjust the audio output level. This applies to the built-in SPEAKER as well as audio to the PHONES and AUDIO OUT connections on the rear panel.
5

Meters

5. Meters
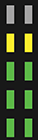
These meters display the main output volume level, or the input source level when recording a sample. If the meter consistently lights up in the red during playback, adjust the volume of your samples. If the meter consistently light up in the red while recording, reduce the volume of your audio input source directly, or by turning down the REC GAIN knob for audio connected to the AUDIO IN connection on the rear panel.
6

Speaker

6. Speaker
This built-in speaker plays audio when nothing is connected to the PHONES or AUDIO OUT connections on the rear panel. Adjust the volume of the speaker by turning the MAIN VOLUME knob.
Important: When recording using the built-in Microphone, the speaker is automatically deactivated to prevent feedback.
7

Microphone

7. Microphone
This built-in condenser microphone allows you to easily sample anything. For more information on recording samples and adjusting the microphone settings, see the Sample Record Mode chapter.
8

SHIFT

8. SHIFT
This button provides access to secondary functions on MPC Sample. Press and hold it and then press another button or pad to access its secondary function. These are printed below the selected control, and are highlighted in the descriptions below.
When viewing parameters and menus on the Display, if the Shift icon ( ) is visible you can press and hold this button to access additional parameters for control using the K1–K3 Knobs or B1–B3 Function Buttons.
9

Encoder

9. Encoder
Turn this knob to navigate menus, adjust settings, and more, depending on the current mode.
10

-/+

10. -/+
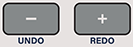
Press these buttons to decrease (-) or increase (+) the selected parameter, or move down (-) or up (+) in the current list.
Undo/Redo: Press and hold SHIFT and press these buttons to undo the last action (-) or redo the last action you undid (+).
11

B1, B2, B3 Function Buttons

11. B1, B2, B3 Function Buttons
Press these buttons above the display to cycle between pages on the display or enable certain functions.
12

K1, K2, K3 Knobs

12. K1, K2, K3 Knobs
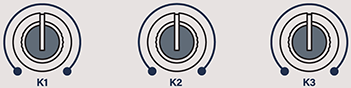
Turn these knobs to adjust various settings and parameters as shown on the display.
Important: These knobs have absolute position only. This means that as you are moving between banks of controls, the knob’s position may not align with the current setting of the parameter in that bank. When this happens, an arrow will appear to the left or right of the parameter name, pointing in that direction. Turn the knob in the direction shown until the parameter becomes selected and the arrow disappears. You will now be able to regain control of the selected parameter using the knob.
13

Fader

13. Fader
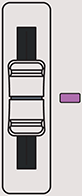
The fader can be used to adjust various pad and kit parameters. By default, the fader adjusts pad volume.
Press and hold SHIFT and press PAD 9 – FADER to select a different parameter to control. See Menus > Fader for more information.
While in Step Edit mode, you can also use the fader to adjust event timing.
Important: Like the knobs, the fader has absolute position only. This means that as you are moving between different controls, the fader’s position may not align with the current setting of the new parameter. The brightness of the Fader LED indicates the relative position of the current parameter value. The brighter the LED, the higher the value. Move the fader until the LED begins changing brightness again, indicating the fader has regained control of the current parameter value.
14

ERASE

14. ERASE
This button is used to erase samples, sequences, events, and automation.
To erase a sample from a pad, stop playback in Sample Mode, then press and hold this button and press a pad. If playback is active, press and hold this button and then press and hold a pad to erase note events from that pad on the current sequence. While in Step Edit Mode, you can also press and hold this button and then press a pad to erase all events from that pad.
To erase a sequence, press and hold this button and then press a pad in Sequence Mode.
To erase automation, select the pad that contains the automation you want to erase. Then, press and hold this button and move the K1–K3 Knob for the parameter with recorded automation. If the FADER is set to control a parameter with automation, you can also move the FADER while holding ERASE. A menu will appear on the display for confirmation. Press the B3 Function Button to continue, or press the B1 Function button to cancel.
COPY: Press and hold SHIFT and press this button to initiate the copy process for samples and sequences. The currently selected pad determines the sample or sequence that is being copied. While still holding SHIFT and COPY, press a pad or pads to select the destination(s) for the copied sample or sequence. Selected pads turn red, and can be pressed again to deselect. Finally, release SHIFT and COPY to complete the copy process for the sample or sequence.
15

NOTE REPEAT

15. NOTE REPEAT
Press this button to engage Note Repeat mode. When enabled, pressing a pad will cause it to sound repeatedly at the set time division. Use the B1–B3 Function Buttons to set the current division.
You can also press and hold this button to temporarily engage Note Repeat. Release the button to disengage Note Repeat.
TRIPLET: While Note Repeat is engaged, press and hold SHIFT to display triplet time divisions for selection using the B1B3 Function Buttons.
16

PAD BANK

16. PAD BANK
Press this button to cycle between pad banks A–H. You can also press and hold this button and press PADS 1–8 to jump directly to a bank. The current bank is shown on the top panel next to the MAIN VOLUME control.
Press and hold SHIFT and press this button to move to the previous pad bank.
17

SAMPLE SELECT

17. SAMPLE SELECT
Press this button to open the sample browser, where you can browse and select a sample to add to the current pad from the internal drive or a connected microSD card (not included).
SAVE SAMPLE: Press and hold SHIFT and press this button to save the currently selected sample. See Loading and Saving Samples for more information.
18

TAP TEMPO

18. TAP TEMPO
 Press this button at a regular interval to set a new project tempo. You can also press and hold this button in any mode and use the ENCODER to adjust the project tempo from the BPM pop-up.
METRO: Press and hold SHIFT and press this button to cycle the metronome (or “click”) between its three states: Off (the metronome does not play), On (the metronome always plays during playback and recording), or Record (the metronome only plays during recording).
19

Pads

19. Pads
These 16 velocity-sensitive pads with poly-aftertouch are used to trigger samples and sequences, and perform other functions. See the Operation chapter to learn more about using the pads in each mode.
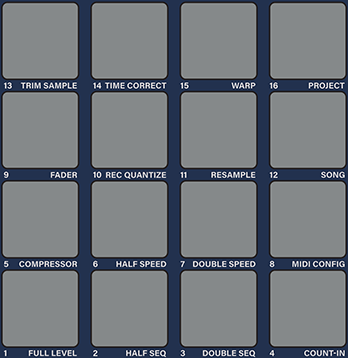
SHIFT FUNCTIONS: Press and hold SHIFT and press each pad to perform the additional function printed below the pad.
  • PAD 1 – FULL LEVEL: Sets all pads to play at full velocity, no matter how soft or hard they are struck.
  • PAD 2 – HALF SEQ: Cuts the current sequence length in half.
  • PAD 3 – DOUBLE SEQ: Doubles the length of the current sequence, duplicating all recorded events.
  • PAD 4 – COUNT-IN: Activates or deactivates the count-in, which gives you a one-bar introduction prior to recording a sequence.
  • PAD 5 – COMPRESSOR: Opens the Compressor menu, where you can apply the compressor effect and adjust its parameters.
  • PAD 6 – HALF SPEED: Makes the events of the current sequence play back at half the speed, taking twice as much space in the sequence.
  • PAD 7 – DOUBLE SPEED: Makes the events of the current sequence play back at twice the speed, taking half as much space in the sequence.
  • PAD 8 – MIDI CONFIG: Opens the MIDI Configuration menu, where you can adjust device settings for MIDI and CV, as well as reset MPC Sample.
  • PAD 9 – FADER: Opens the Fader menu, where you can select the active fader parameter, or deactivate it entirely.
  • PAD 10 – REC QUANTIZE: Activates or deactivates record quantization, causing all events you record to snap to the grid based on the current quantization setting. You can adjust the quantize value in the Timing Correct or Sequence Mode pages.
  • PAD 11 – RESAMPLE: Automatically resamples all audio from the current sequence and adds it as a new sample to the chosen pad.
  • PAD 12 – SONG: Opens the Song Mode page, where you can combine your sequences into a song and export it to a new audio file or a new sequence.
  • PAD 13 – TRIM SAMPLE: Trims the sample on the selected pad, removing any content before the Start point and after the End point.
  • PAD 14 – TIME CORRECT: Opens the Timing Correct menu, where you can adjust the timing and quantization settings for pads in your project.
  • PAD 15 – WARP: Toggles the current Warp mode between Time Stretch and Pitch. When set to Time Stretch, adjusting the Warp value changes the length (and tempo) of the sample, but keeps the pitch the same. When set to Pitch, adjusting the Warp values changes the length (and tempo) of the sample as well as adjusting the pitch.
  • PAD 16 – PROJECT: Opens the Project page, where you can load, save, or start a new project. You can also access the internal microSD Card Storage from this menu when connected to a computer.
 

Mode

The buttons in this section determine the current function mode of MPC Sample. You can learn more about these pages and functions in the Operation chapter.
20

SAMPLE

20. SAMPLE
Press this button to open Sample Mode. Here, you can trigger your samples, view and edit their parameters, and more.
INPUT CONFIG: Press and hold SHIFT and press this button to enter the Input Configuration menu, where you can select and adjust audio input sources.
21

SEQ

21. SEQ
Press this button to enter Sequence Mode, where you can record and edit sequences of note events.
STEP EDIT: Press and hold SHIFT and press this button to enter the Step Edit menu, where you can view and adjust individual events in your sequence per step.
22

PAD FX

22. PAD FX
Press this button to activate Pad FX mode, where you can use the pads to trigger effects that are applied to your entire sequence.
FLEX BEAT: Press and hold SHIFT and press this button to enter Flex Beat FX mode. In this mode, the pads trigger time-based effects that warp the pitch, time, and volume of your sequence for beat chops, DJ-style scratches, and trance gate effects.
23

KNOB FX

23. KNOB FX
Press this button to activate Knob FX mode, where you can use the K1–K3 KNOBS to adjust effects applied to specific pads, freeing your pads for other uses.
FX SELECT: Press and hold SHIFT and press this button to open the Knob FX selection menu, where you can select the active Knob FX and select the pads to which Knob FX is applied.
 

Pad Play

The buttons in this section determine the functionality of the pads while in Sample Mode. You can learn more about these functions in the Pad Play chapter.
24

CHOP

24. CHOP
Press this button to activate Chop Mode. When activated, the sample on the selected pad is automatically chopped by the selected chop type (Threshold by default), and the pads are assigned to trigger each available slice.
To return to Trim Mode, press the CHOP button again.
NOTE ON: Press and hold SHIFT and press this button to set the current pad to NOTE ON mode. In this mode, pad playback occurs only while the pad is held down. NOTE ON mode is indicated on the Sample page by the note icon ( ).
25

LOOP

25. LOOP
LOOP: Press this button to activate loop playback for the current pad. While activated, triggering the pad initiates the loop, which plays between the Loop Start Point (set using the K3 Knob while Loop Mode is active) and the Sample End Point. Loop mode is indicated on the Sample page by the loop icon ( ).
REVERSE: Press and hold SHIFT and press this button to activate reverse playback for the current pad. While activated, triggering the pad starts sample playback from the Sample End Point and moves backwards to the Sample Start Point (or Loop Start Point, if Loop playback is active). Reverse mode is indicated on the Sample page by the arrow icon ( ).
26

MUTE

26. MUTE
Press this button to activate Mute mode for the pads in Sample Mode. While activated, press a pad to mute it, which prevents its sound from being heard during playback, but does not remove any recorded events from the sequence. Muted pads are lit red, while unmuted pads are lit yellow.
You can also press and hold this button to temporarily engage Mute mode. Release the button to disengage.
UNMUTE ALL: Press and hold SHIFT and press this button to unmute all muted pads.
27

16 LEVELS

27. 16 LEVELS
Press this button to activate 16 Levels mode for the pads. While activated, the currently selected sample is copied across all 16 pads, with the selected 16 Levels TYPE determining how the sample changes across the 16 pads. 16 Levels mode is indicated on the Sample page by the 16 icon ( ).
TYPE: Press and hold SHIFT and press this button to select the 16 Levels type:
  • Velocity: The sample increases in velocity across the 16 pads.
  • Filter: The filter cutoff point of the currently selected filter type is adjusted across the 16 pads. Pads 1–8 increase the cutoff from the minimum point to the current Cutoff value. Pads 9–16 increase the cutoff from the current value to the maximum point. Depending on the current Cutoff value, the range of available value adjustment may be limited. The Cutoff value can be adjusted using the Filter functions in Sample Mode.
  • Tune: The pitch of the sample is adjusted across the 16 pads. The sample at its original pitch is placed on PAD 4, with pads below this lowering in pitch and pads above this increasing in pitch.
 
28

SAMPLE RECORD

28. SAMPLE RECORD
Press this button to enter Sample Record mode. In this mode, you can record audio from connected sources to create your own samples. See the Sample Record Mode chapter for more information.
RECALL: Press and hold SHIFT and press this button to retrieve the last 25 seconds of audio input from the currently selected input source into the next available pad.
29

SEQ RECORD

29. SEQ RECORD
Press this button to enter Sequence Record mode. See the Sequence Mode chapter for more information.
RECALL: Press and hold SHIFT and press this button to retrieve events played during the last loop of sequence playback into the sequence.
30

PLAY

30. PLAY
Press this button to start playback or recording from the beginning of the sequence.
CONTINUE: Press and hold SHIFT and press this button to start playback from the current playhead position.
31

STOP

31. STOP
Press this button to stop playback or recording.
Quickly double-press this button to stop all audio.
Tip: The buttons’ LED states provide additional information on what functions are active, available, or unavailable.
If a function is currently active, the associated button is brightly lit. For example, when you are in Sample Mode, the SAMPLE button is brightly lit.
If a button is available to be used but not active, it is dimly lit. If a button is not available to be used, the LED is completely off. For example, if you are in Sequence Mode, you cannot access the Chop or 16 Levels functions, so those buttons’ LEDs are off.
When you press and hold SHIFT, buttons that have available secondary functions are dimly lit in red if they are inactive, or brightly lit in red if they are active. For example, if you are in Knob FX Select Mode, the button is brightly lit in red. This will remain brightly lit in red as long as you are in this mode, whether or not you are holding SHIFT.